How to Create a Comic Book
Writing a comic book or graphic novel script is not the same as writing a novel. The most obvious difference is the incorporation of artwork with the story. Creating a comic book is a harmony of writing and art that demands a ton of work.
How to Write a Comic Book
Like writing any other book, you’ll start with an outline or brief snippets to frame the story.
Planning your story is up to you, but one tried and true method is to do a short overview of the entire story. Almost like a short story version of your story. Maybe draft a statement or two with some backstory. Then bullet out or write in full sentences the major points of the story.
Once you have that outline established, you can start writing the rough draft script for your comic.
Keep in mind that comic books are visual stories and you’ll need to think like a visual storyteller. You’ll follow the common act structure used in scripts and the writing will primarily be dialog.
That’s not a rule set in stone by any means. Just look at this panel from Frank Miller’s famous graphic novel 300:
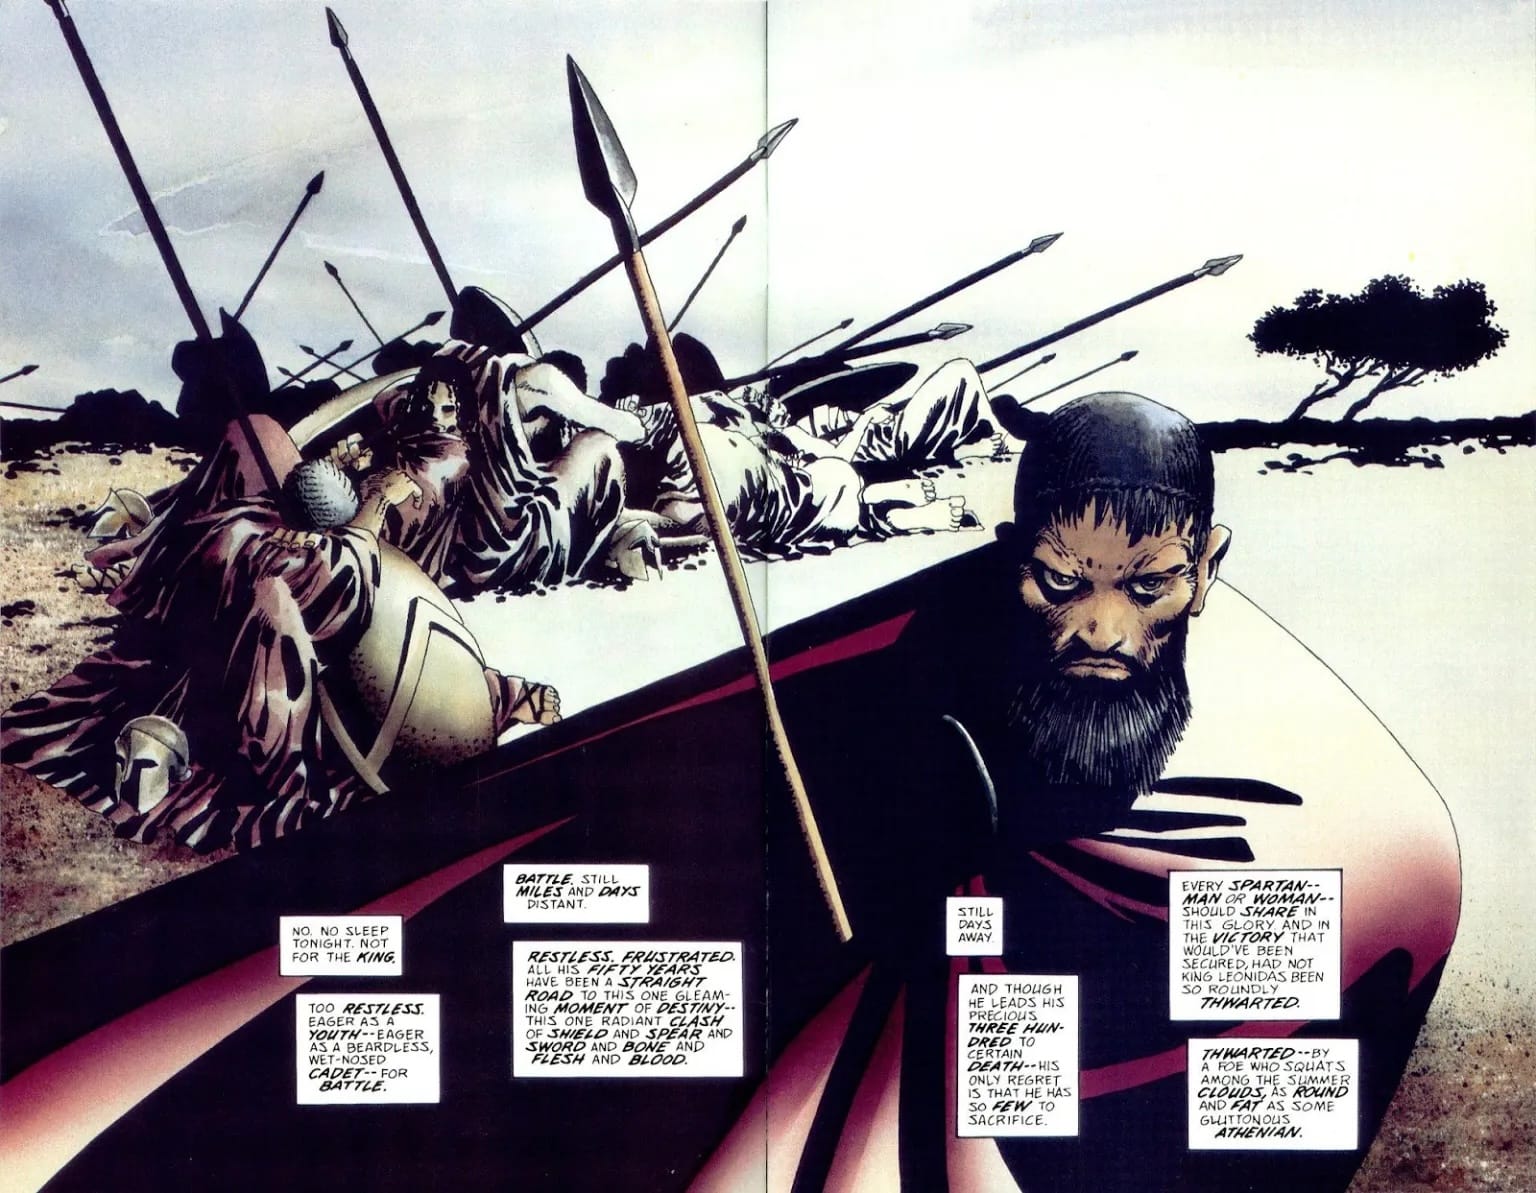
A full spread with no dialog and a lot of narration. But there’s a lesson here too. Consider Rachel Gluckstern’s comment on using captions:
Essentially, the more you rely on captions, the more you’re telling, not showing.
A masterful storyteller like Frank Miller can break the rules and make it work. And you can too. Still, most of your comic book pages will be filled with action (artwork) and dialog.
Show, don’t tell. Speak, don’t explain.
Being a Comic Book Creator
With the first rough draft done, consider your comic book design. Are you a writer/artist or just a writer? If you don’t plan to illustrate the comic yourself, now is the time to find and start working with an artist.

Finding the right artist to work with is a major turning point for your story. Even if you thought up the idea and drafted the outline and script, your artist will play a huge role in creating this story. The roles take a 60/40 split on responsibility for the book’s success. And for some books, it might even be a down the middle split.
Because the artist has the challenging job of not only interpreting and understanding the story, but then bringing it to life on the page through sequential art. Just like the dialog has to flow naturally, each panel in your comic book must work with those before and after it.
Comic Book Layout
This phase of the game comes in four segments; storyboarding, drawing, ink & color, and lettering. These pieces fit together similarly to laying out a novel: if you don’t do them in the right order, you’ll be making more work for yourself.
Storyboarding
In my own (limited) experience working on comic book projects, I have to say that the storyboarding part was far and away the most fun and exciting part.
There are lots of tools out there for online storyboarding. HubSpot compiled a respectable list, so I won’t try to reinvent the wheel. I will say that their top pick, Storyboarder, is one I’ve used and enjoyed working with.
Or you can go old school and storyboard on paper.
Whatever method you choose, the goal is to lay out the panels you’ll include in the comic.
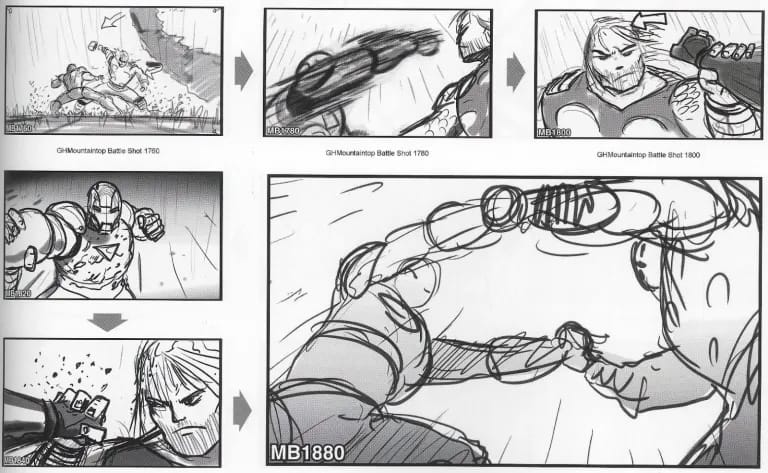
The actual art on the storyboards can be rough. It could even be stick figures and directions. You’re trying to imagine the sequential art and story.
Imagine this exchange:
Character #2: “We’re going to jump in my spaceship and fly out of here.”
Ch#1: “That seems like a terrible idea.”
Ch#2: “Maybe, but it’s what we’re doing. Come on.”
<Ch#2 walks off>
Ch#1: <after a pause> “Hey, wait up.”
Simple exchange (sort of) between two characters. And relatively easy to imagine as images. Now imagine it as comic panels:
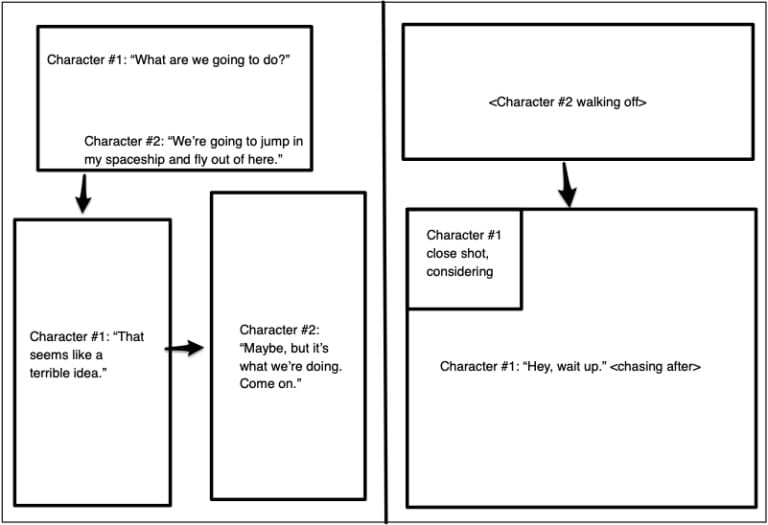
Very rough, but you can see how I imagine the action flowing. Would you do it the same?
I’m guessing not. This is why the storyboard is so important.
Drawing
After you establish the storyboard and have a visual guide to the layout and design of the comic, it’s time for your artist (or you, if you’re taking both roles) to go to work.
Today, many artists will use computer-assisted design like Adobe Illustrator or similar tools to create comic book art. Alternatives like the open-source Inkscape or Affinity Designer are powerful, lower-cost options.
Color & Ink
This part of the process differs from years past. Historically, a hand-drawn comic or graphic novel would require an ‘inker’ to highlight the drawings with detailed ink work (it’s not tracing). Likewise, the inked drawings would need to be colored and any final touches to add depth, shading, and definition to get the panels looking pristine.
Today, software handles a lot of these complex tasks. The color & ink phase is more about tweaking the color palette to ensure that the images are vibrant and will render well when printed.
The last part of this phase involves controlling the negative space on each panel so the last step can be achieved.
Lettering
Again, since we’re in the digital world here, it’s simple enough to select a font and drop text into bubbles over the finished images. And of course, it is more complex than that. Selecting a font is itself a job. And making distinctions about how characters will ‘speak’ to each other is important.
Take Neil Gaiman’s Sandman for example:
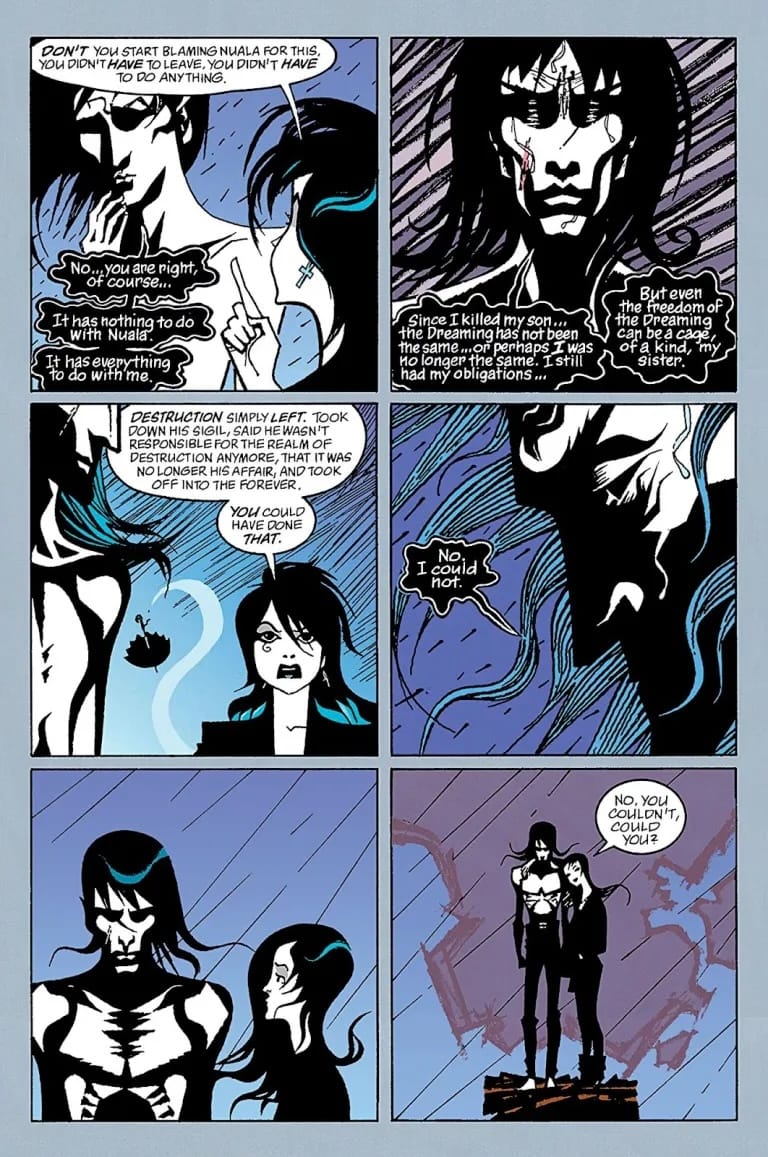
These two characters each have distinct speech bubble styles and fonts. While your comic likely doesn’t need to be this unique, spend time considering how you’ll handle the dialog.
The Finished Product
Panels drawn. Check. Colored and inked. Check. Speech bubbles. Check. Cover designed. Check.
You’ve created a comic book!
Now you just need to publish it.
How Do You Publish a Comic Book?
For comic books, graphic novels, and manga, avoiding bigger publishing companies and using print-on-demand is the perfect solution. You avoid pitching your book to publishers without footing additional costs like stocking books. The cost of a full-color book can be steep, so keeping books in stock adds up. But print-on-demand means no inventory. And you can easily sell your books through your website with Lulu Direct.

