
Book Spine Best Practices for Professional Book Covers
It cannot be overstated how important your book cover is. It’s the first impression, the spark that drives a reader to learn more about your book.
A great cover doesn't stop at the front. Your book's spine is just as important—it's what readers see first on a bookshelf, and even small design mistakes can make an otherwise polished cover look unprofessional.
The good news? A few simple guidelines will help ensure your spine prints correctly. This includes designing for bleed and correctly placing your spine, as well as the critical task of planning for variance.
What Is a Book Spine?
A book’s spine is the center of the cover, the narrow (or wide) edge where the pages are bound. There are many ways to bind a book. For our purposes, we’re going to focus on Paperback books (also called perfect-bound books) because they’re one of the most commonly used binding methods.
Perfect binding involves milling the spine edge of the pages to create a series of notches. Then the printer rolls glue over the spine edge, and the book block is pressed into the cover until the glue sets. This glued edge becomes the book’s spine.
Design Your Cover as One Complete File
Your cover should always be created as a single file that includes the:
- Back cover
- Spine
- Front cover
Spine width is determined by your page count, so every book needs a custom cover template. For the best results, generate your template by uploading your final interior PDF file on Lulu. If you're designing your cover first, you can download a preliminary template from our pricing calculator and replace it with an updated version once your page count is finalized.
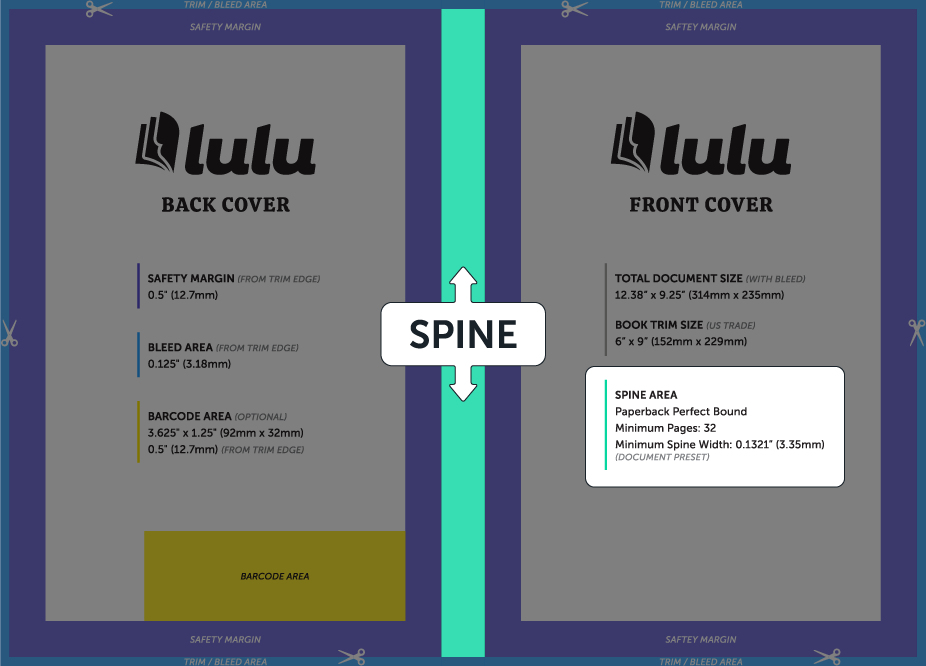
Leave Room for Print Variance
During printing and trimming, tiny variations can occur. While they're usually only fractions of an inch, they can cause spine artwork or text to shift slightly.
To avoid noticeable issues:
- Don't place important design elements directly against the spine edges.
- Leave at least 0.125 in (3 mm) of clear space on either side of the spine text.
- Avoid creating a spine that's a dramatically different color than the front and back cover unless that color intentionally extends onto both covers.
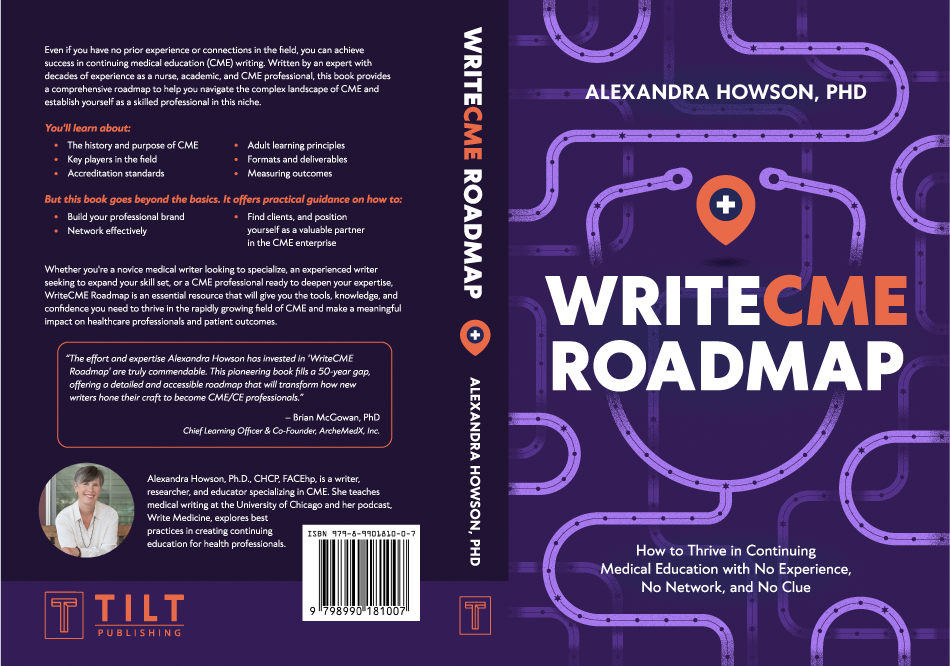

Center Your Spine Text
If your book is thick enough to include spine text, keep it centered and leave adequate padding on both sides.
A typical spine includes:
- Book title
- Author name
- Publisher logo (optional)
If your spine is very narrow, it's often better to omit text entirely than risk it printing off-center.
Don't Calculate Spine Width Yourself
While there are formulas for estimating spine width, you don't need to do the math.
If you or a professional are designing your cover before your interior is finalized, you can use Lulu's pricing calculator to generate a preliminary cover template using your planned book specifications and estimated page count. Once your interior is complete, download a new template based on the final page count and make any necessary adjustments before publishing.
You can also generate a custom cover template with the correct dimensions after creating a new project and uploading your interior file.
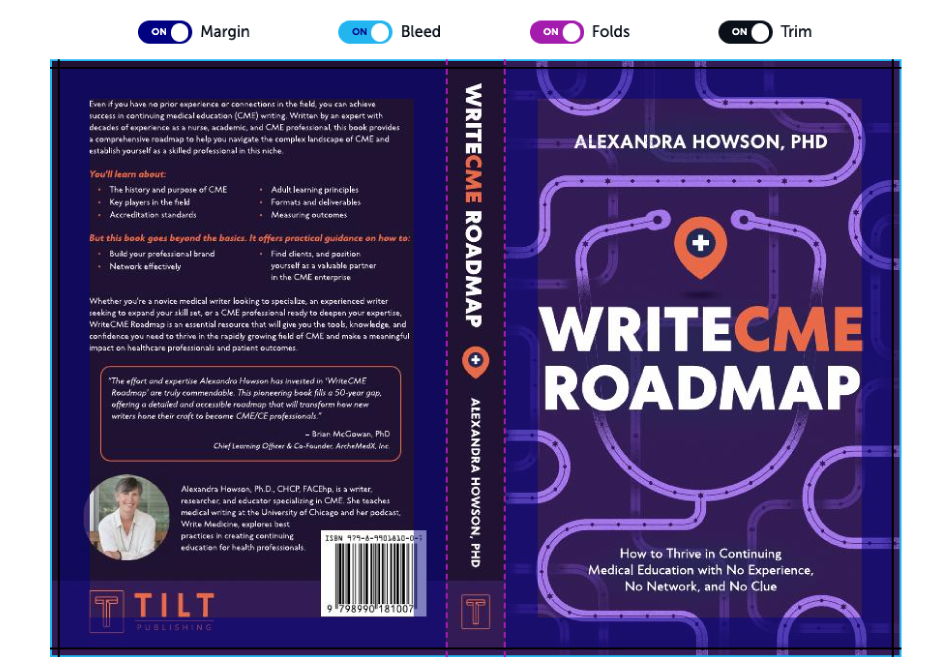
Review Before You Publish
Lulu provides a preview tool to review your cover after you upload it. Before approving your book:
- Verify that all spine text is centered.
- Check that important artwork stays outside the trim area.
- Preview your full wraparound cover to ensure the front, spine, and back align as expected.
A few extra minutes reviewing your cover can help prevent costly reprints and ensure your book looks polished from every angle.
Book Spine Best Practices
Your spine may be the narrowest part of your cover, but it has a big impact on how professional your book looks. By designing with print variance in mind, using a custom cover template, and leaving enough space around text and graphics, you'll create a cover that's ready to print with confidence.