Creating Picture-Perfect Photo Books
Here at Lulu, we love creative types. People who are driven to create and share their inspiring projects with the world, whether those projects take the form of a novel, a TikTok account, a cookbook, a brand, a journal, or whatever else you can think of!
We also know that not all creative types are writers! Spoiler alert: you don’t have to be a writer to publish a book. We’ve talked before about publishing and selling a no/low content project like a journal or planner, but those aren’t the only options. For content creators with an artistic flair, we’ve got the perfect product to help you preserve and (or!) share your content: photo books.
Not All Photo Books Have to Be Photos
Before you say “Hang on, I’m not a photographer, what would I make with a photo book,” don’t worry. When most people hear the phrase “photo book,” one of two things comes to mind:
1. A big, glossy, hardcover coffee table book full of high-color photos of landscapes or animals or a decade of fashion.
2. A family photo album, made slightly fancier because it’s been printed and bound as a book instead of just printed 4×6 photos tucked into an album.
Both of these types of photo books are valuable and worth making! If you’re a photographer looking for ways to promote or monetize your art I highly recommend a big, glossy, hardcover coffee table book full of your photos and text. And if you’re a fan of tangible photo albums you can keep on display, then a printed collection of your favorite family photos is a beautiful way to preserve those memories (plus, they make great gifts for the whole family).
But if you’re looking for ways to monetize your existing content, promote your art or your brand, and reach new audiences, there’s more to consider than just your standard coffee table photo album. Keep reading (or scroll to the bottom of the post, you do you) for a whole list of project ideas that aren’t just photo books.

Create Your Book
Use Lulu's free templates to easily create and publish your book today.
Before You Get Started on Your Photo Book
The first step of publishing a photo book is determining the best online photo book publisher for you and your project. If you’re looking for a suggestion, I know a good one…
But if you’re still exploring your options, how do you determine which online photo book service is right for you? There are a lot of factors to consider, from overall project goals to design details. Ask yourself these questions:
- Is your goal to create a photo book that is a personal, one-off printed copy, or are you hoping to create a product that you can sell online or in stores?
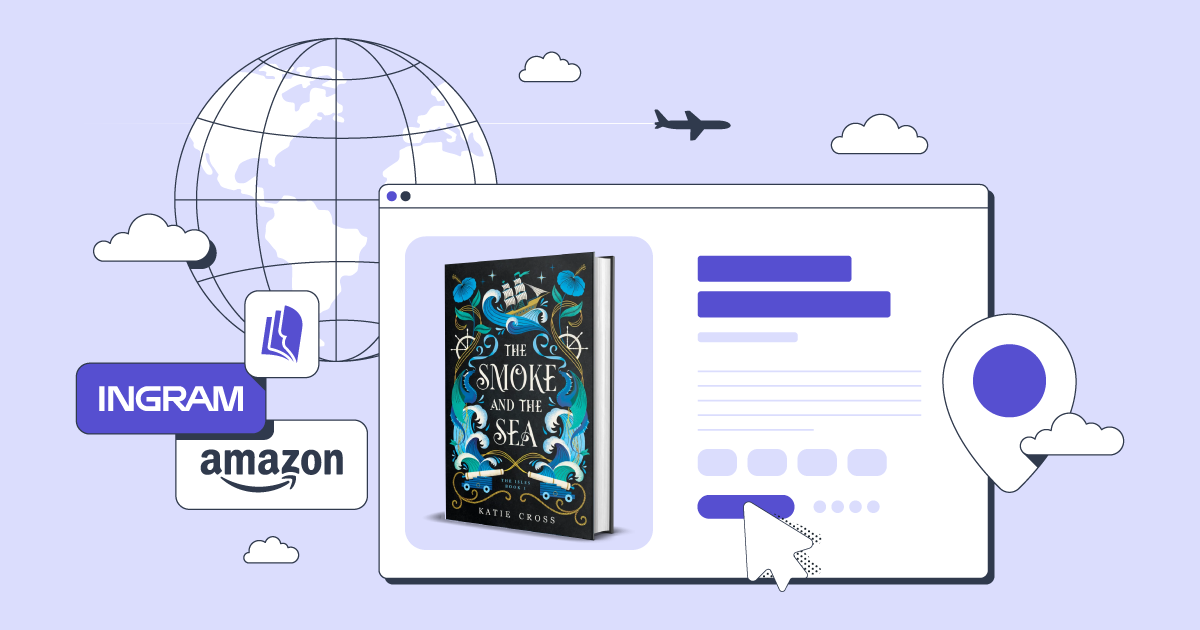
- If you are creating a photo book to sell, how do you plan to sell it? In-person, at a local bookstore? On Amazon? Directly to consumers from your own website? Which publishing company offers the best distribution options to help you meet your goals?
- What is your budget for this project? If you’re creating a personal project, how much are you willing to spend on a single copy of this book? If you plan to sell your photo book, how much do you want to earn per sale? What is your target retail price?
- Pro Tip: Use our Book Pricing Calculator to determine the production cost of a Lulu project before you even get started.
How to Print a Photo Book
You’re ready to go! You’ve done your homework and determined which online photo book printing platform is the best one for you. If that’s Lulu, you will need to have a print-ready, fully-formatted PDF of your interior book file ready to go. So now it’s time to design your photo book!
I’m going to be honest with you: there is no good, concise way to offer a step-by-step guide on how to create a photo book. With the wide variety of tools and platforms out there (everything from Canva to Affinity Publisher to Adobe InDesign), there isn’t a one-size-fits-all process for creating your book. However, there are tips and best practices to keep in mind while you’re creating your photo book. So let’s take a look at a few things to consider (in order!) while creating your book!
1. Determine Your Photo Book Specs Before You Format
Before you begin formatting your book layout, you need to know how you want the final product to look. Start with your book size and shape – do you want your book to be landscape, portrait, or square? If you want a landscape, do you want it larger, like a US Letter or A4 landscape? Or smaller, like a 9×7 landscape? The same questions for portrait, and even for square.
Beyond your book size, you’ll also want to work out your print details. When publishing a photo book on Lulu your interior options will automatically default to Premium Ink (either Black & White or Full Color, your choice) and our highest quality 80# paper, because we want your on-paper print quality to match your on-screen image quality.
2. Make Sure Your Photo Files Are Formatted for Print
Nothing is more disappointing than putting together a beautiful photo book, getting the page layout just right, ordering a proof copy, and receiving a pixelated, grainy mess in response. Do not assume that your photo files are the correct specs for printing—take the time to check your file sizes and your PPI (Pixels Per Inch) / DPI (Dots Per Inch).
At Lulu, we recommend that your photo files are 300 PPI/DPI for detailed graphics.
3. Consider Your Photo Book Text and Story Options
Time to ask yourself another important question: do you plan on doing any writing for this book?
Maybe you don’t, at all. Which is okay! Maybe you do plan to add some text to your photo book, but just a little bit—no more than a sentence or two for photo captions on some pages. Maybe you’re planning to do quite a bit of writing, including full paragraphs of text to go along with your photos. Whatever the case may be, you need to commit before you lay out your book. And if you choose to include captions or longer paragraphs, you also need to write those before you lay out your book.
Writing your copy is also a great time to decide what story you’re going to tell. Regardless of what kind of photo book you plan to create, you will probably find some kind of narrative unfolding as you plan out your pages. Maybe you choose to display your landscapes in chronological order. Maybe you choose to lay out your art by the medium.
Whether you tell your story in pictures, pictures with captions, or pictures with paragraphs of text, you need to think about narrative. It can be frustrating to try to rearrange your photos after you’ve properly laid out your interior file, so plan ahead with a narrative outline for both your photos and your copy.
Also frustrating: getting a proof copy of your photo book only to find that while your page spreads are flawless and your photos printed beautifully, there’s a typo in your page one caption. No matter how little or how much copy you write for your book, make sure you take the time to edit it. Run editing software like ProWritingAid or Grammarly, cash in a favor with a friend or beta reader, or even consider hiring a copyeditor.
4. Plan Your Interior Layout
It’s time! You have your book specs, your photos are formatted, your copy is written and your book is all plotted out—now you’re ready to get to that design step! And once again, it’s time to ask yourself an important question: how comfortable are you with editing and design software?
If you’re not comfortable designing your own book but still want to use a platform like Lulu for our print and distribution options, consider hiring a professional to help get your book layout just right! Marketplaces like Fiverr can be fantastic for connecting you with design pros who can help you create the perfect book.
Software like Adobe InDesign or Affinity Publisher can be incredible tools for book formatting, but you don’t have to be an Adobe Pro to create a photo book. User-friendly (and free-to-use!) platforms like Canva can be a great and easy way to design your photo book.
If you are planning to format your own photo book interior, there are definitely a few details you’ll want to keep in mind, including:
Margins & White Space
Whatever book format you choose, pay close attention to the interior page dimensions. When designing a book on Lulu, you can download interior page templates for any of our book sizes. Check out this one for our Small Landscape pages:
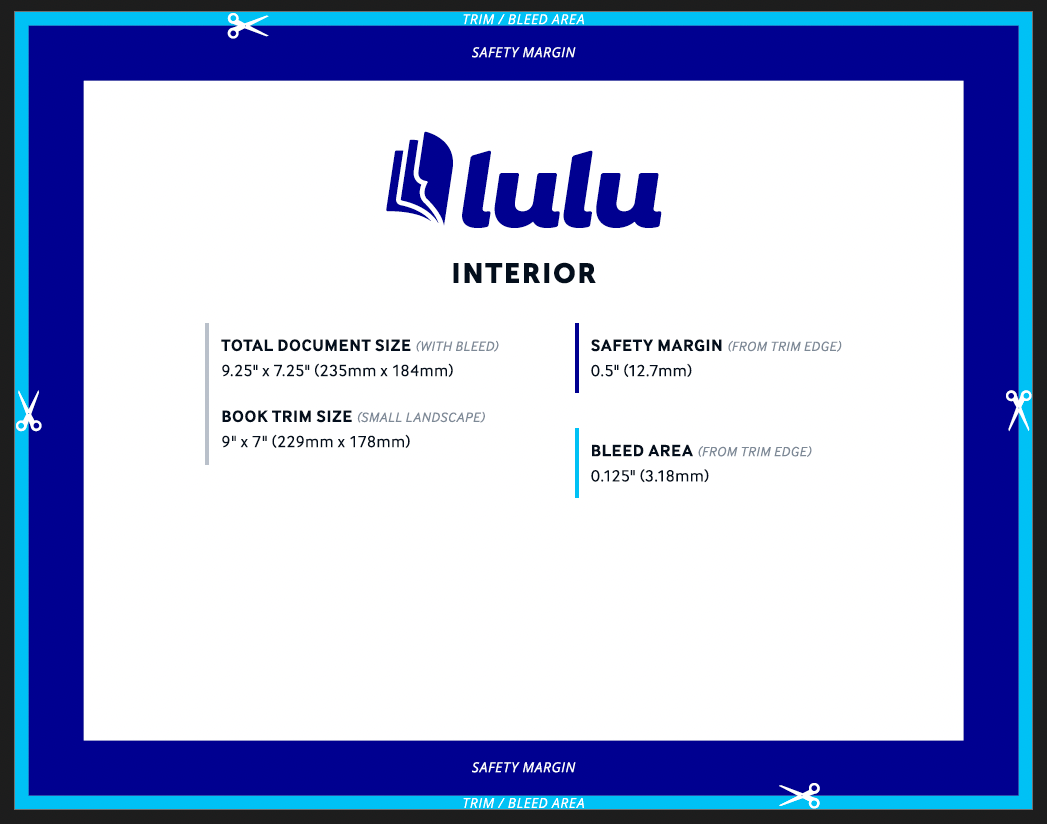
Notice the two borders around the page, the Trim/Bleed Area and the Safety Margin. Depending on how you place your photos and text in this template, you may see a white space bordering some or all sides of your photo. Alternatively, you may see the edges of your photo cut off along the Bleed Area.
Both choices are aesthetic options you can make with your photo layout. Just make sure you’re mindful and intentional about which option you choose.
Page Spreads
Some of the design software available to help you create your interior files will show you the full page spread—both the left and right pages of the book together. But some of them will not. If you’re using a tool that involves creating your pages individually, make sure you stay cognizant of your full-page spreads!
Spreads can be a great way to highlight a single image or fit extra copy onto a page. One thing to consider when you’re designing a spread is the gutter—the space in between the two pages that sinks into the binding. You’ll inevitably lose some of your photos in that space, especially if you’re crossing over from the left page to the right page, so keep that in mind when you’re placing your photos and copy!
One other reminder: books start on the right page. So if you choose to design your book in spreads, make sure your first page is still just a single page. Otherwise, you may find your entire design off by one page!
Front Matter
While photo books are a unique subset of printed books, there are a few publishing staples that you should consider. Especially if you plan to sell your book through global distribution or make it available in local retailers – not only should you include the front matter in your book, but you will be required to. If you’re not familiar, the front matter is the material that makes up the first few pages of a book – material like a copyright page, title page, table of contents, etc. It may not all apply to your book, and that’s fine, but I would definitely encourage you to include at least some of this material. For a deeper dive into the front matter, take a look at this post.

Your Free Lulu Account
Create a Lulu Account today to print and publish your book for readers all around the world
5. Wrap Your Book in a High-Quality Cover
You’ve put a lot of work into perfecting the interior of your photo book—don’t phone it in on the cover! We all know that consumers will always judge a book by its cover, but it’s even more true for photo books. Would you trust the interior quality of a photo book that didn’t have a striking, high-quality cover?
Go back to those books you looked at when deciding your book size and orientation. Consider your cover options—what did they do? In many cases, photo book covers are just a featured photo from the book, whether it’s one of the best or the photo that best represents the book’s theme. There’s no need to reinvent the wheel with your photo book cover!
Of course, that still applies to photo books that aren’t strictly photography or art. Consider, for example, a cookbook. How can you identify a cookbook from ten paces away, without even picking it up? Simple: there’s almost always a photo of food or a photo of a person serving food on the cover. And it’s almost always food that you can find the recipe for right there inside that book (yes, with the same photo that you see on the cover).