Lulu Direct Buy Button Setup Guide
The Direct Buy Button is the easiest way to offer print-on-demand books for sale on your own website, a social media profile, in your emails, or with a QR code.
This short guide will walk you through the process, including creating a Lulu Project, setting up your sales channel, and designing a buy button. If you run into any issues while you’re setting up, refer to our in-depth help articles.
This guide will help you quickly connect your published Lulu project to a direct buy button, URL, or product card.
What is the Direct Buy Button?
Lulu’s Direct Buy Button is a fast and easy way to offer direct sales without using a dedicated ecommerce platform like Shopify. Lulu partners with Stripe to offer a secure checkout experience using a buy button or direct checkout link.
Let’s break down the ways you can use the Direct Buy Button:
- Direct Checkout Link - This is a URL that you can use literally anywhere. When clicked, it will open a cart experience powered by Lulu and Stripe, allowing your readers to buy your book directly from you. Use the direct checkout link for your email newsletter, social bios, or to create QR codes for your marketing.
- Product Showcase - A full product listing including a thumbnail of your book’s cover, the title, description, retail price, and a button to add the book to a cart. This is a perfect way to embed a product listing without using a pricey ecommerce platform.
- Product Preview - Create a simplified product listing with just the thumbnail, title, pricing, and add-to-cart button. A great way to link to your book from a blog post or landing page.
- Button Only - Add a custom-style call-to-action button that adds your book to a shopping cart. Ideal if you’ve already got your site built to your liking or for quickly linking to your book for purchase.
Each of these options presents a simple way to sell your books without leaving your site.
Lulu acts as a print-on-demand fulfillment partner, handling all of the complicated tasks like printing, shipping, and collecting taxes. Like managing the printing, packing the books, charging for taxes, shipping, and ensuring delivery.
Why You Would Need a Direct Buy Button
The use cases are pretty simple.
- Do you want to sell your book without using a retailer or ecommerce platform?
- Do you have social followers?
- Do you have email subscribers?
- Do you have a website or blog?
If you answered yes to any of these questions, you can make use of the Direct Buy Button.
Once you’ve published a print project on Lulu, you can connect to a Stripe account and offer sales from literally anywhere. With the direct checkout link, you can drop a link to a custom-branded, Lulu-powered shopping cart wherever you’d like. And with the embedded checkout options, you can quickly create a product listing for your website.
Another crucial bonus when selling direct is that you can collect customer data. By offering an opt-in at checkout, you can ask them to join your mailing list. Email is one of the absolute best ways to earn more money and create a sense of community amongst your fans.
Creating & Using the Buy Button
Watch this short tutorial for a video walkthrough of the Buy Button setup and management.
The simplest way to understand how to use buy buttons is to break them into a three-part implementation:
- Creating a Lulu Project
- Creating a Sales Channel
- Connect Your Project to Your Sales Channel
Don't let the terminology scare you; it’s a pretty simple process.
Creating a Lulu Project
The first step is to create your print book or calendar on Lulu. Here’s a 1-minute tutorial that shows the entire process.
The buy button will work with any printed project, including books and calendars, but also simple projects to create, like notebooks or journals.
Lulu Publishing Steps
If you’d prefer some quick written instructions, here’s how to publish on Lulu in three steps.
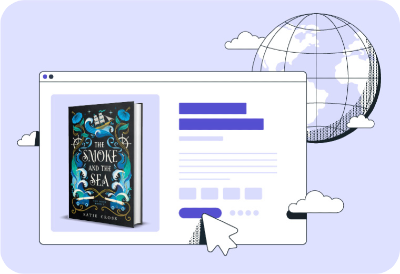
1. To start, determine the size, paper, and ink options you’ll need for your book. You can opt to list the project on the Lulu Bookstore or use the Print Only option for a quicker publishing experience.
2. Upload your print files for your interior and upload or create a print file for your cover. Once uploaded, we’ll review them, call out any potential print issues, and let you use a browser-based preview to see how the book will look.
3. Finally, you’ll publish the book and order a proof copy for review.
Once you’ve hit publish, you’ve got a completed project in your Lulu account, and you’re ready to connect that to your Buy Button in Lulu Direct.
Creating a Sales Channel
With your project ready, you’ll navigate to My Stores and select the Direct Buy Button as your sales channel.
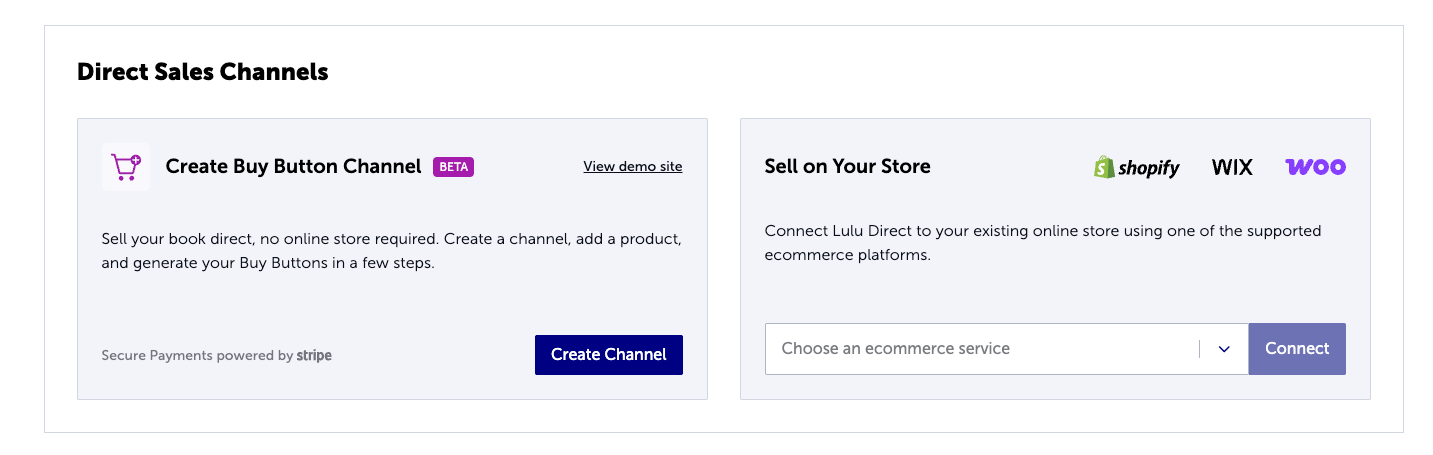
From here, you’ll be walked through the process of connecting to Stripe. We use Stripe as the secure payment processor for Direct Buy Button transactions. This enables us to safely offer you and your customers a checkout and cart experience with the minimum effort or work on your part.
It’s important to note that you’ll only need to set up the Stripe connection once. You can add multiple sales channels or use a single sales channel for all of your projects.
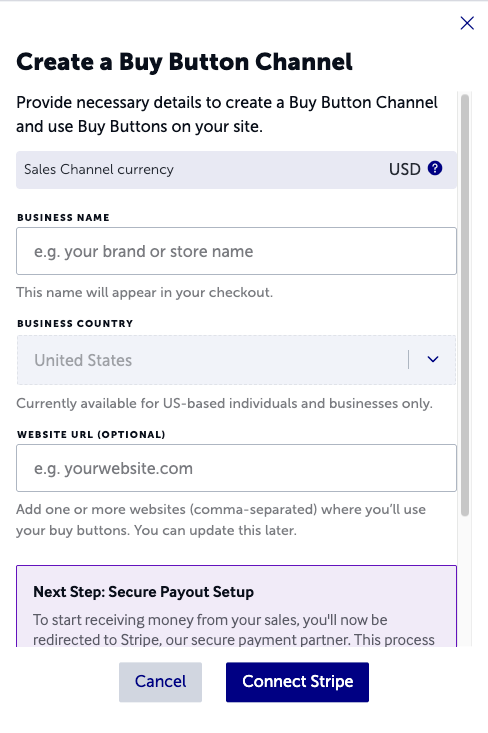
The business name and website are the basic details for your sales channel. Click Connect Stripe to open the Stripe connection screen, where you’ll provide your personal and banking details. That includes:
- An email and phone number for verification
- Your full legal name and address (US only at the moment)
- Your date of birth and the last 4 digits of your Social Security or Tax ID number
- Your bank account details for payment processing (you can enter your info manually or sign in to your bank’s online account)
This process will allow you to connect to a Stripe service called Link. This is an additional Stripe service that will allow you to use your Stripe account to purchase on any site that supports Link. You do not need to opt into Link to securely connect your personal info to your Stripe account.
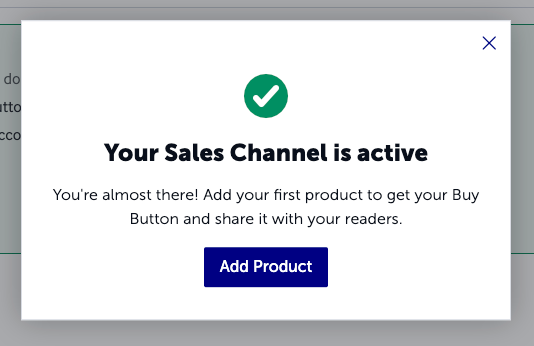
Once you’ve entered and verified all of the necessary information, you’ll be directed back to the Lulu Direct dashboard with a notification that your sales channel is ready.
Create a Product & Connect Your Project
Now you’ve got a published project and a sales channel; you just need to connect the two to enable your buy button! But first, a quick note on important terminology. You’ll see both Project and Product used throughout Lulu Direct and the associated helpful content.
- Project - Anything you create and publish on Lulu is a project. That includes print books, calendars, and ebooks (note that ebooks are NOT available for the buy button at this time).
- Product - Products are the items you create in Lulu Direct to list for sale with Shopify, Wix, WooCommerce, or with the Direct Buy Button.
Every Product you create in Lulu Direct will have a published Project associated with it. And if you make edits to your Lulu Project, the Product it’s connected to will be updated.
Okay, that's covered; let’s look at how to connect your published Project to your Product.
Connecting Lulu Projects to Lulu Direct Products
You’ll need to select from a list of print Projects in your account, create a Product name, add a Product description, and set a retail price.
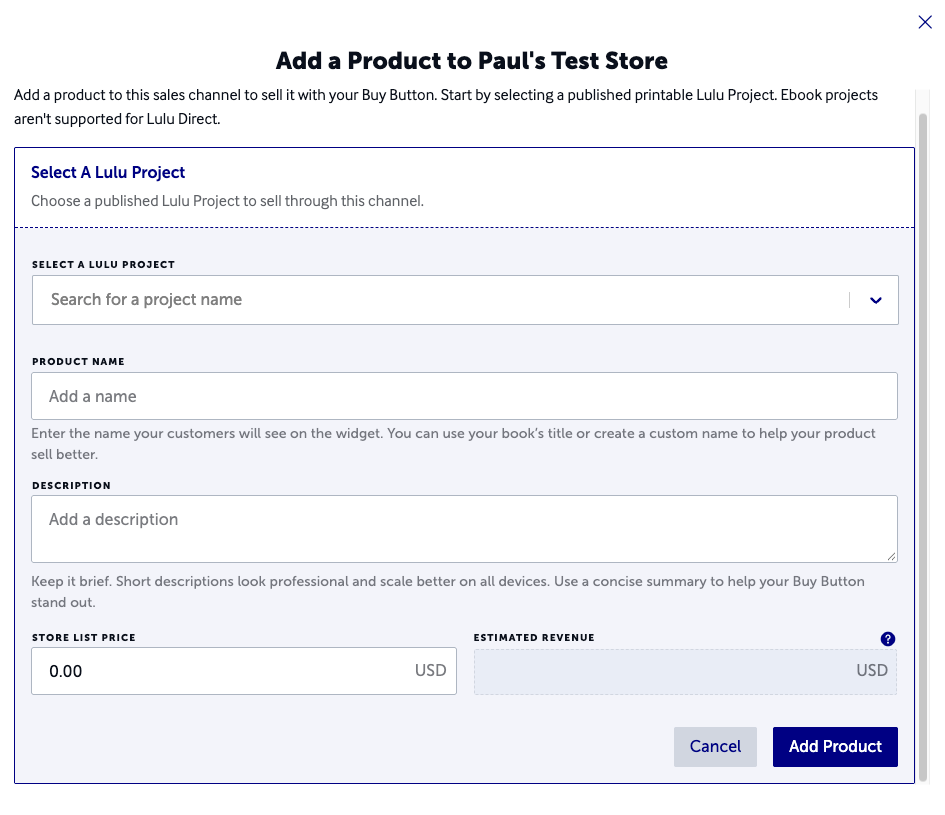
When you click ‘Add Product,’ you’ll essentially be done! The Project is linked to the Product, and you’re ready to create a buy button or direct checkout link.
You’ll be automatically directed to the new Product’s details page. At the top of the page, you’ll see basic Product details, just like you would for a Product sold using Lulu Direct’s Shopify, Wix, or WooCommerce integrations.
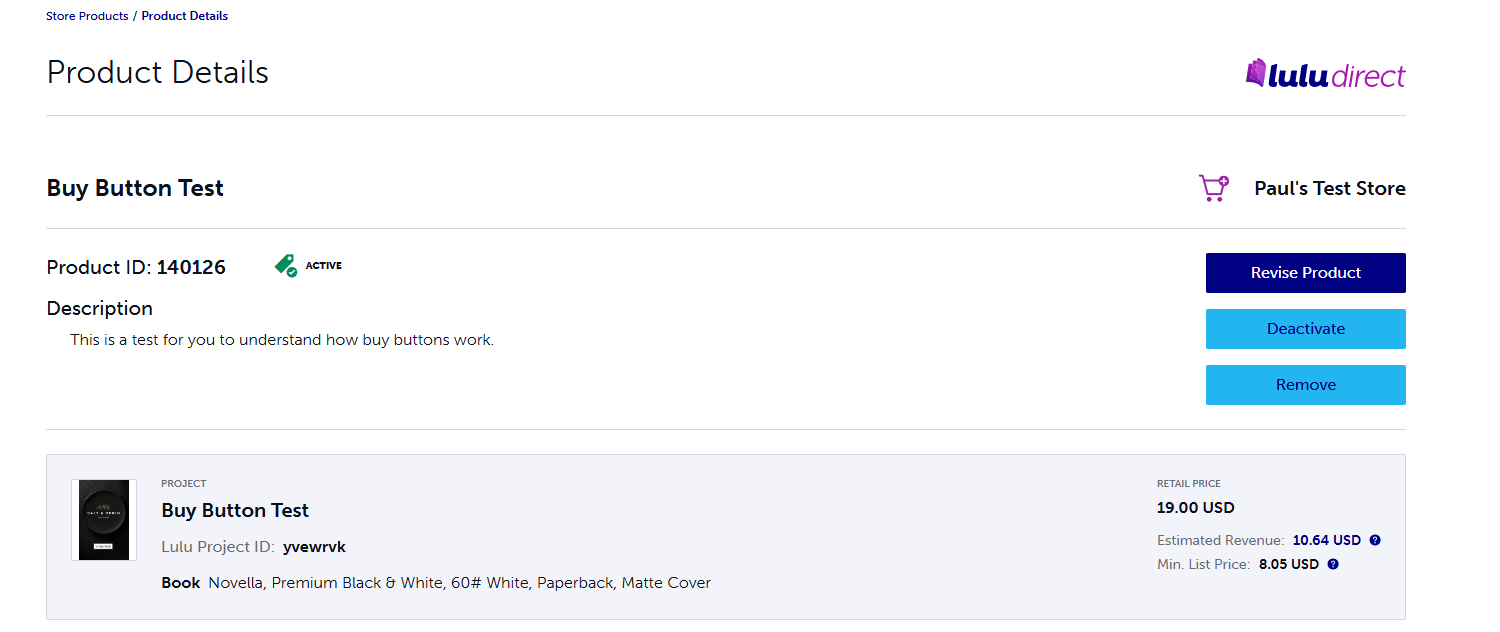
If you scroll down this page, you’ll see the unique options available for your Direct Buy Button (the same four I listed earlier in this article).
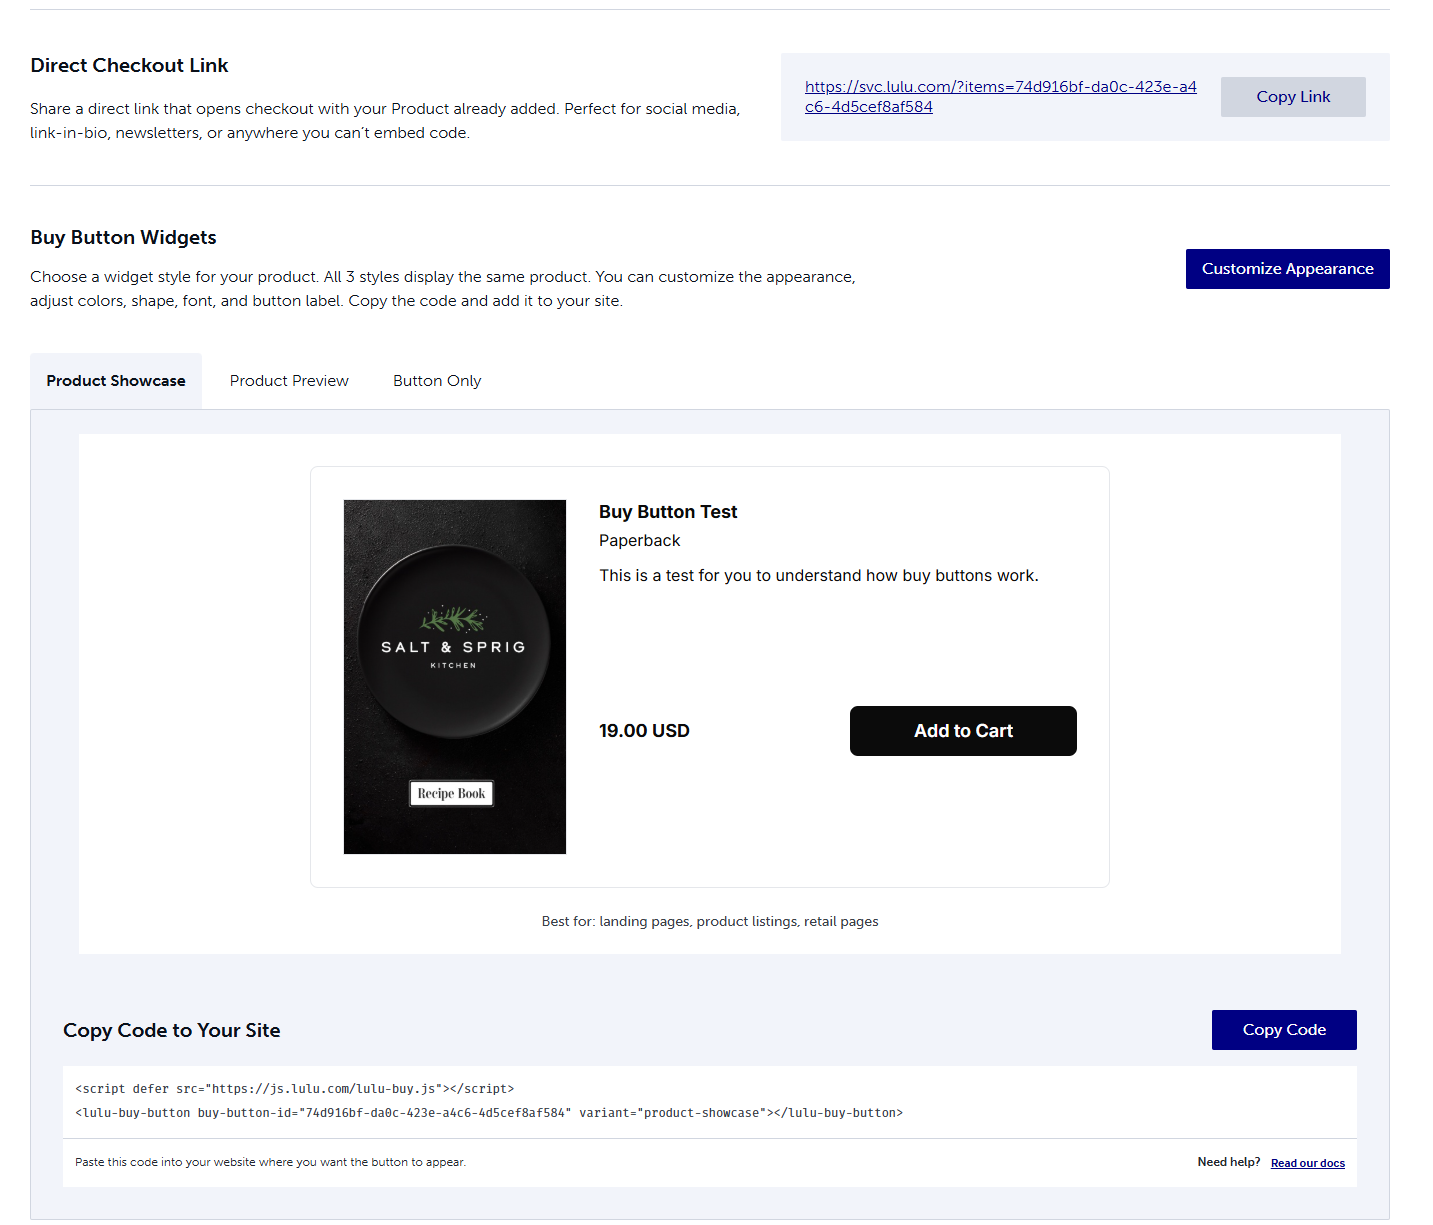
Direct Checkout Link
This option is the simplest. It’s literally just a URL you can copy and paste anywhere you want. When someone clicks the link, they’ll be directed to a checkout experience for that book. The user can add more copies if they need to and check out securely.
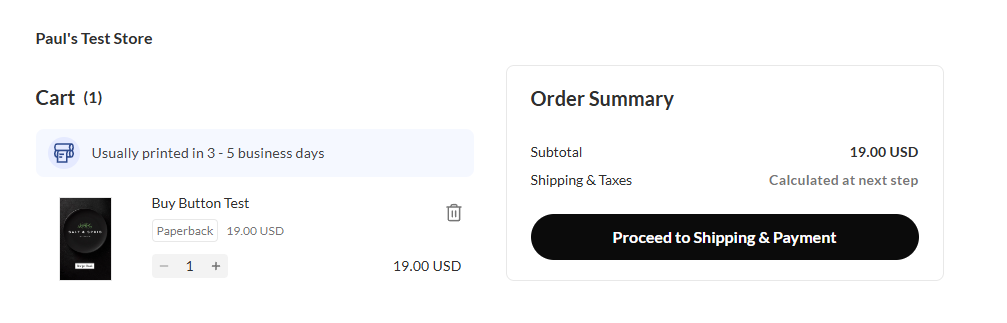
The link is the most versatile option. Here are some different ways you can use the Direct Checkout link to sell your books.
- Email newsletters
- Social media profiles
- Bios
- QR Codes
It’s also worth noting that the link can be attached to any word, image, or other element on your site. So long as it can be linked to, it can be a link to buy your book!
The only limitation to the Direct Checkout link is that it does not create a shopping cart. When your buyer clicks, they’ll go directly to checkout for your book. This is nice for quick shopping experiences where your buyer is probably only after that single product.
Direct Buy Button
This option creates a snippet of code you can embed on your site to create a product card and buy button for your books. The code is very simple and will look something like this:
<lulu-buy-button buy-button-id="XXXXXXXX-XXXX-XXXX-XXXX-XXXXXXXXXXXX" variant="product-showcase"></lulu-buy-button>
The script tells your site how to render the buy button, and the buy-button-id tells it which Project to include. You’ll also notice the ‘variant’ selection. When you create an embedded buy button, you’ll have three variants to select from:
- Product Showcase
- Product Preview
- Button Only
You can use any or all of these variants on your site as you see fit.
You’ll also have the opportunity to customize your embeds, with options to adjust colors, button styles, fonts, and text sizes. These customizations update each variant and will be displayed in a live preview while you’re customizing.
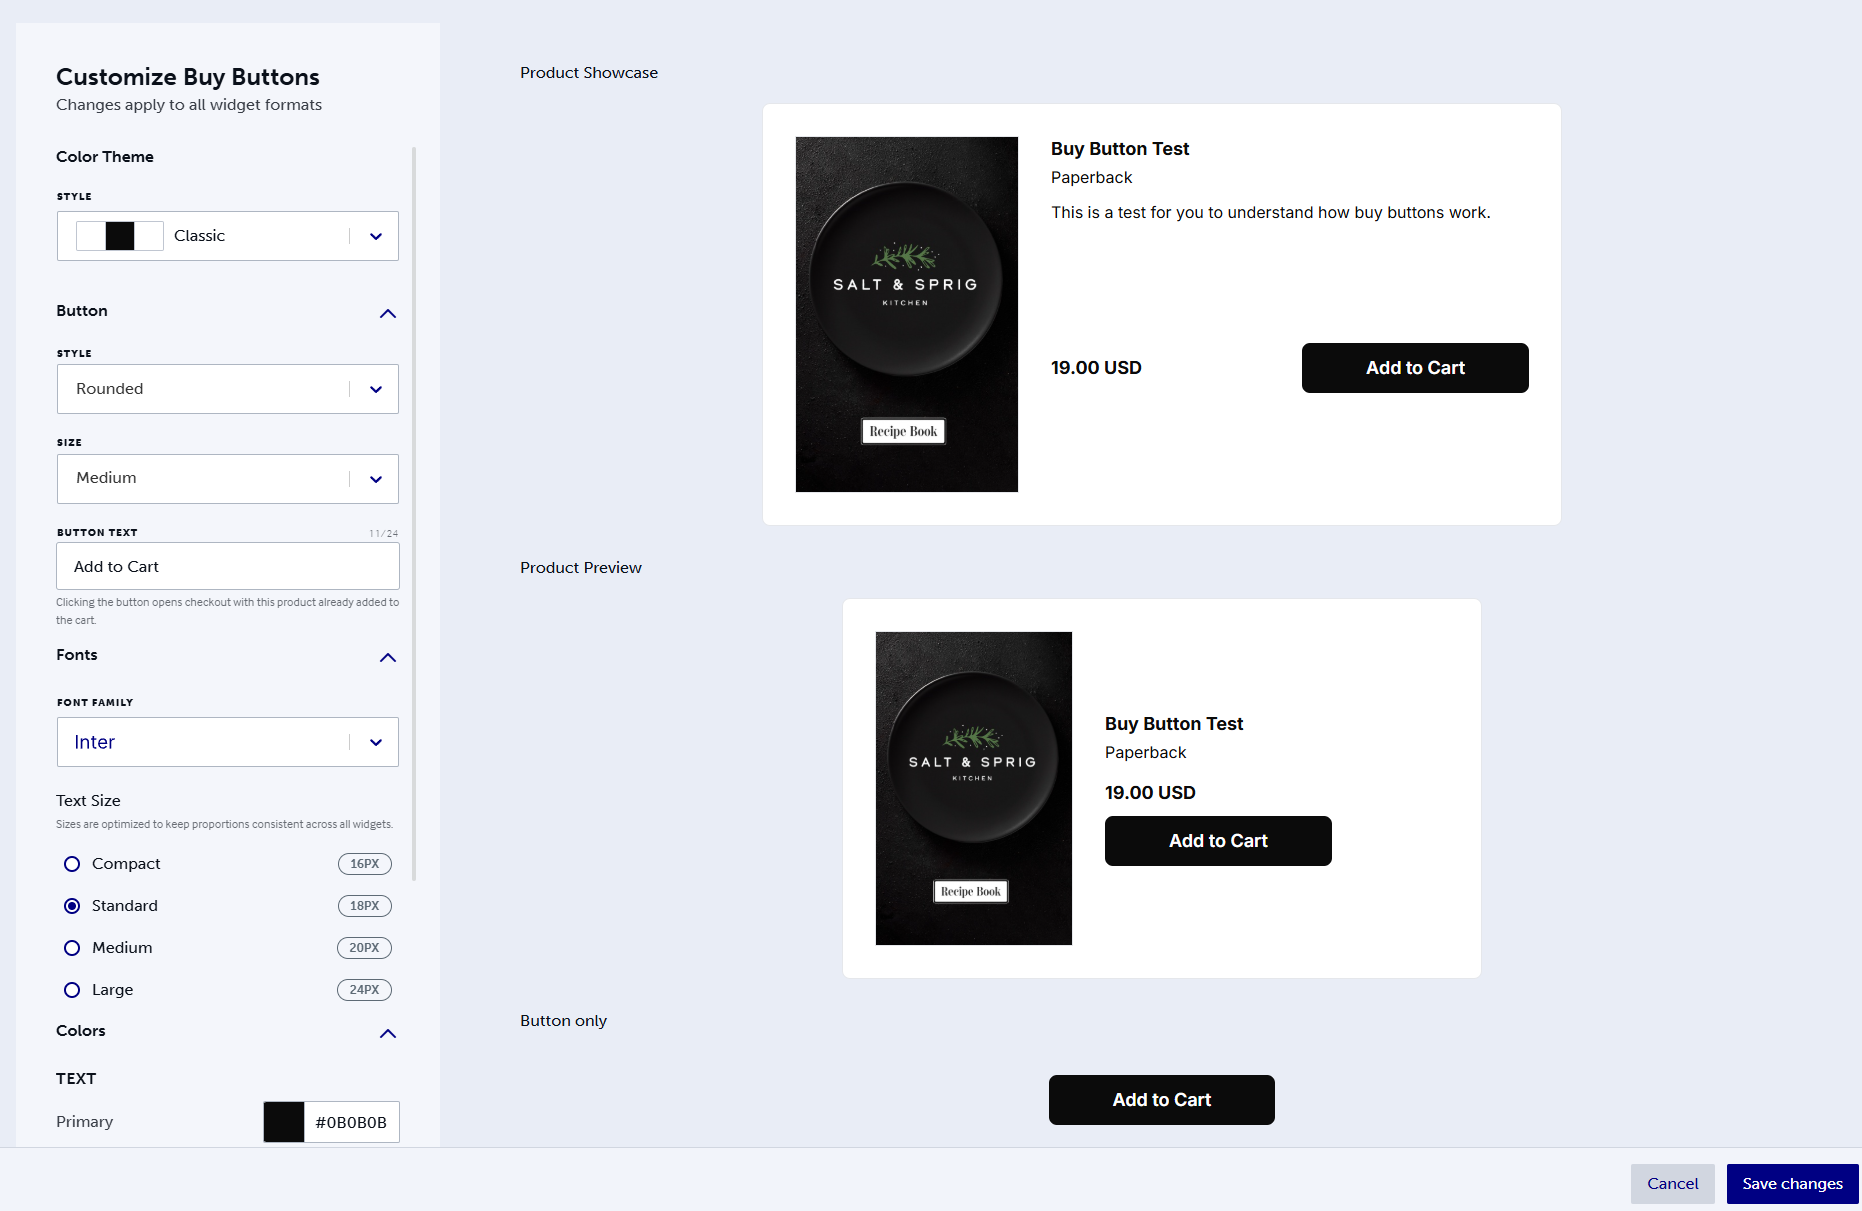
Once you’re done customizing your buy button, save the changes and copy the code to embed it on your site.
If you want to experiment with the embedded buy buttons, we’ve created a demo site that lets you see each of the variants and test the checkout experience.
Simplifying Direct Sales
Lulu’s direct sales tools are all about solving problems for people who sell books. The Direct Buy Button is just the next option we’re able to bring to you. It’s perfect for selling through email or social media, is a great option for testing direct sales, and is easy to set up.
If you’re not selling your books directly to your readers, you’re missing out on the opportunity to collect user data and earn more revenue. Not to mention the versatility and customization to make the buying experience completely on-brand for you.