From Blog to Book: How to Turn Your Content into a Published Book
If you’re a creator, author, or entrepreneur with your own website, you either have a blog or you should have a blog. Because we know from studies like this one from HubSpot that blogs drive new users from search engines to your site. Creating regular, long-form content does two important things:
- It shows people who read your content that you’re knowledgeable
- It provides search engines with more context about your site
Blogging is great!
So, now that you’ve got several posts written, what do you do? Sure, those articles will continue to bring in traffic from search engines. But couldn’t you do more with all those words you’ve written?
Of course, you read the title of this post, so you know I’m going to tell you to take that blog you’ve been working on for years and turn some of it into a book!
Why You Should Turn Your Blog Into a Book
Your blog is already a great source of new traffic from the web. And if you’ve monetized it with ads, you are already making money from your content.
Those are nearly the same reasons you would turn your blog content into a book.
Your book is a terrific marketing tool for building awareness and lead generation. The launch is a great reason to send your fans an email, market on social media, and even promote the book on your own site and blog. Just being a published author lends you credibility and authority.
When you publish your own book, you’re telling readers that you have the knowledge to offer them something valuable.
And of course, you can sell the book from your website to your fans. With modern print-on-demand, publishing your blog into a book won’t cost you much. Over time, as you sell your book and create more, you’ll begin to enjoy some passive revenue from those book sales.
You’ve got a blog full of content and you’ve got followers who like to read what you create. That’s a ton of content ready to be turned into a book!
Choosing Which Blog Posts to Include in Your Book
Don’t just copy and paste your most recent blog posts into a new doc and title it ‘My Book’. You’ve got to be discerning and purposeful when you choose which posts to include.
Instead of just telling you how easy it is to turn some blog posts into a book, let me show you. I’m going to use existing content to create a short book about turning your blog into a book.
How to Choose Your Content
Start with your data. Which posts get the most readers every month? Which posts consistently lead to readers clicking one of your other links or buying a book? That’s the content your fans value the most.
And it’s ripe for expansion.
My example topic (turning a blog into a book) is a bit niche, but that’s okay too! If there’s a topic you’ve written a post about and know it’s relevant to a specific audience, write them a book.
Once you’ve narrowed down your topic, make an outline. Here’s mine:
Introduction
Part 1: The benefits of a book
- Additional revenue stream
- Reputation building
Part 2: Finding a topic
- Associated blog posts
- Organize and sort
Part 3: Finding Posts
Part 4: How to make a book
- Compiling
- Designing
- Publishing
Part 5: Selling
Part 6: Misc
- Marketing & Tech
Now I have a few sections I need to fill out with content. It’s time to go to my list of posts and sift through them. This part of the process took me the longest but after a couple of long sessions rereading (and obsessively making minor edits to) blog posts, I came away with 35 posts with content I could use.

Your Free Lulu Account
Create a Lulu Account today to print and publish your book for readers all around the world
Editing, Revising, and Expanding Blog Content
Sadly, no matter how great your writing is, there’s no way anyone can just read your post in a book exactly as you published it on your blog. You have to edit the posts you’ve selected to make them cohesive.
Here’s the point where you ‘write’ your book. Much like writing a blog post, take the outline and add content to each section. Except, instead of writing these sections, you can copy/paste content directly from your blogs. While I worked through this process, I was able to eliminate 14 of the posts on my list, bringing me down to 22 with content I want to use.
With all the individual pieces of content from a variety of posts pasted into your working document, it’s time to edit all those pieces together so they make sense. You will have to do a substantial amount of writing, though but still less than you would if you were writing the book from scratch.
For the first chapter of my book (“Why You Should Turn Your Blog Into A Book”), I want to use this post about the benefits of publishing for entrepreneurs and content creators. The post is broad and has to introduce publishing basics. I’ll be doing that elsewhere in the book, so I’ll cut those sections. Then I’ll need to revise all the content to align the tone. Luckily, I write in a fairly consistent voice.
Even if all your posts are similar in tone and writing style, you’ll need to review and scrutinize them carefully to be certain your book is consistent throughout.
Publishing Your Book
With all your blog posts edited together and additional content is woven in to make your book, you’re ready to upload and publish so you can start marketing to your fans!
To turn your manuscript into a book that you can print, start with a template. Every online print-on-demand service is going to offer you preformatted templates to define the page size, margins, bleed, and more. Use that template to resize your pages.

Formatting Your Book for Print
Now you’ve got to format those pages so they look like a book and not just a wall of text.
Formatting is a process and will include selecting the fonts, styles, and sizing for all the text in your book. You’ll also want to include header and footer content (like the book title, your name, and page numbering) as well as format any images you’ll include.

Export the formatted file as a PDF and use Adobe Reader to verify that it’s ready for printing. Here are the steps to verify a PDF is printable by Lulu:
- Export with Print Settings – The exact language varies, but you should always export from your Word Processor with the highest quality settings available.
- Open Your PDF in a PDF Editor – Now that you have a PDF, open it in Adobe Acrobat or your editor of choice.
- Check Fonts – Go to Files > Properties > Fonts. If all Fonts show (embedded subset) then your fonts are embedded.
- Check Images – Start a project on Lulu and upload your file. If any images in the file are low resolution, you will see a warning and the pages to review.
- Check for Layers – Same as Step #4, an uploaded file with multiple layers will display a notification that layers were flattened.
Uploading Your Book Files
Once you’ve prepared your files, you’re ready to upload and publish your new book. Here’s a very short video that covers how to upload and publish using Lulu:
Your Book and Your Blog Content
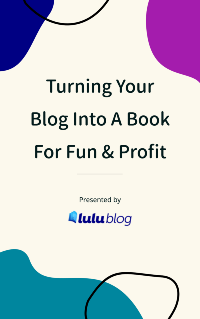
Remember the outline I presented earlier? Well, I took that outline and content published on this blog to create a short book for you! After merging all the content together and drafting new where needed, I used Adobe Express to make a simple cover and Atticus to do the interior page layout.
Turning Your Blog Into a Book
Download this Free Ebook featuring everything you need to turn your blog content into a book your fans will love!
It ended up incorporating elements from 17 different posts. Each chapter includes a little unique content to tie everything together, but largely repurposes existing content. All of which I compiled in less than two weeks.
If you’re a blogger or a content creator of any kind, you should always be on the lookout for ways to repurpose the content you’ve already created. Turning a series of blog posts into a book is a great way to make a new product for your audience and build credibility for yourself by publishing.


