Affinity by Canva: Simple, Free Page Layout
We all know that page design and layout are tough. Even a simple book design that only incorporates text requires setting margins, allowing gutter space, and finding the right font, spacing, kerning, and line height. Doing all of this digitally adds another layer of complexity because you won’t know exactly how the book will look until you print a copy.
And the last thing any creator wants is to spend time, energy, and likely money on designing a book, only to get the printed proof and be utterly disappointed with their design choices.
Book design has been (and will continue to be) one of the sticking points for independent publishing and selling. First, you’ve got the contents of your book—content you’ve no doubt worked hard compiling, organizing, and editing. How it appears in print is nearly as important as the content itself. You need your book to reflect you and your brand and to effectively convey your content (whether that’s fiction, nonfiction, photography, art, or whatever).
Software for book layout has always existed in two camps:
- Ridiculously expensive, complex software that does everything
- Cheap (or free) software that does some things, but not well.
Understanding Book Design Software
Those two kinds of software I just mentioned are exemplified by Adobe InDesign (high-end, high-price) and Microsoft Word (cheaper, less sophisticated). InDesign is the premier design software for just about anything. Books are simply one form of graphic design that Adobe is happy (for a monthly subscription) to offer the best software in the world for.
There’s not even any real argument here. Adobe has built the tool for page layout. It’s expensive, and there’s a steep learning curve. But once you learn it, InDesign is just the best.
The other side of the page-layout coin is Microsoft Word. We’ve had various incarnations of Microsoft’s office suite for decades now, and while Word is pretty good for writing and editing, it’s (at best) mediocre for page layout. That doesn’t mean you can’t do it, but setting up pages, sections, and margins can (and oftentimes will) cause unexpected shifts in your content.
Alongside these two programs, you can find a wide range of similar products. Scribus is open-source page layout (but again, tough to learn and handle). Google Docs can technically export a PDF, though the actual page layout options will be minimal.
And then there is Affinity Publisher.
The History of Affinity Publisher
Built by Serif, a British software and publishing company, the Affinity suite of tools was released as an affordable alternative to Adobe’s products. Publisher first launched in 2018 and became publicly available in 2019. At the time, the entire design suite (Publisher, Photo, and Designer) was sold through a perpetual license, meaning users paid once for access to the entire suite of tools indefinitely.
In 2020, Serif released their V2 for all three Affinity products, including a ‘StudioLink’ feature that allowed users to switch software on the fly with the same file. For professional designers, this is a huge benefit, allowing them to use Publisher for page layout, switch to Photo to touch up or adjust images, and then go right back to page design. Seamless. And all for that single license you only pay for once.
Then in 2024, Canva bought Serif. Yeah, that Canva, the online design platform with a wealth of free-to-use features. They purchased Serif, and for about a year after that purchase, Affinity users were simply waiting to see what the fate of this design software would be.
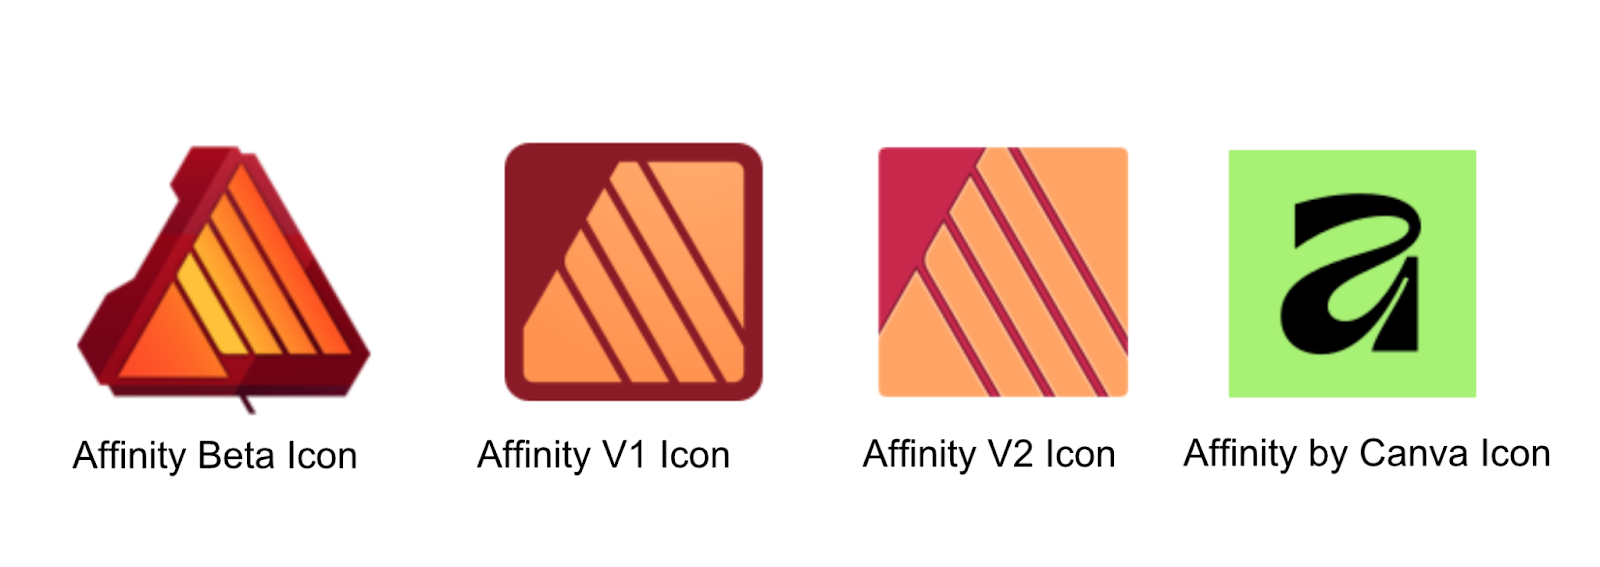
In 2025, Canva relaunched Affinity with a new logo. In a fairly surprising move, Canva opted to make Affinity completely free. Anyone can go to Canva’s Affinity site (here: https://www.affinity.studio/) and download the software. All you need is a Canva account to sign in, and all three Affinity tools are yours.
Using Affinity by Canva to Build Book Files
I’ve been a fan of Affinity since it was released, and I’ve used it for all my book projects since then. Which is only a handful of books, but Affinity is perfect for someone like me. I don’t need to give Adobe $20+ a month for a tool I’m only going to need once or twice a year. But I do need the functionality to place images, align text into columns, and build custom page layouts. Things MS Word is really not equipped to do.
Affinity remains the perfect balance. Now with the software available for free from Canva, this is the right time to learn how to make the most of Affinity for your book layout.
I’m not going to give an exhaustive guide to using Affinity by Canva. The Help Center on Affinity’s studio site has specific details for getting started and learning the ins and outs of designing with Affinity.
What I am going to do is run through how to start, design, and export page files for your book.

Sell Your Book, Your Way
Sell books on your Wix, Shopify, or WooCommerce website with Lulu Direct.
Or use our Order Import tool for your next book launch.
Step 1: Using Lulu’s Page Templates
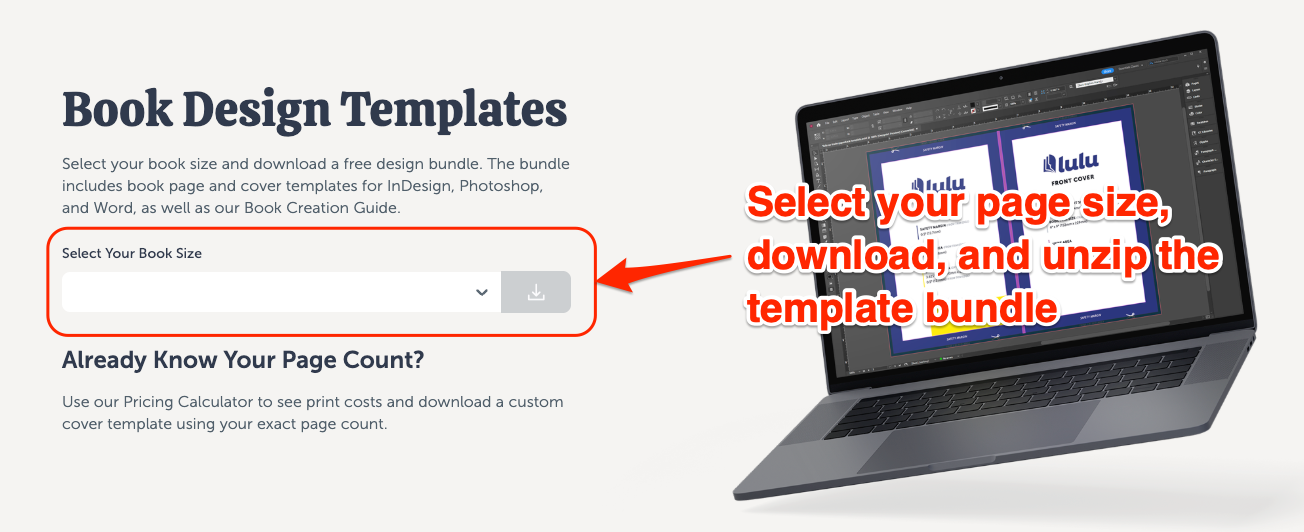
The first step (after installing Affinity, of course) is to head to Lulu’s site and grab a template bundle. Select the bundle based on your page size.
With the bundle folder open, you’ll have a ton of preset files ready to use for your book. You’re going to need to find the IDML files (these are built for InDesign, but Affinity can open them).
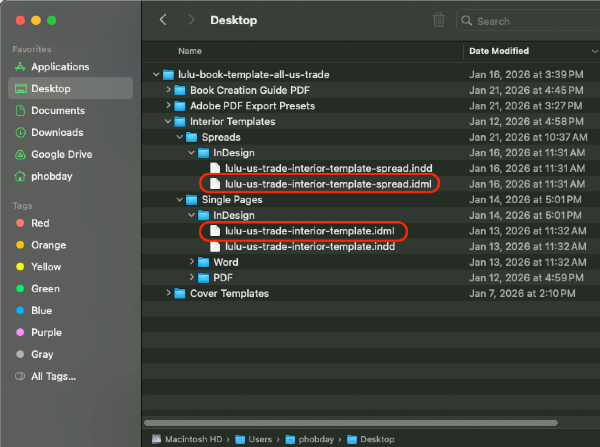
Here I’ve noted the Interior Template files in the Spreads and Single Pages folders.
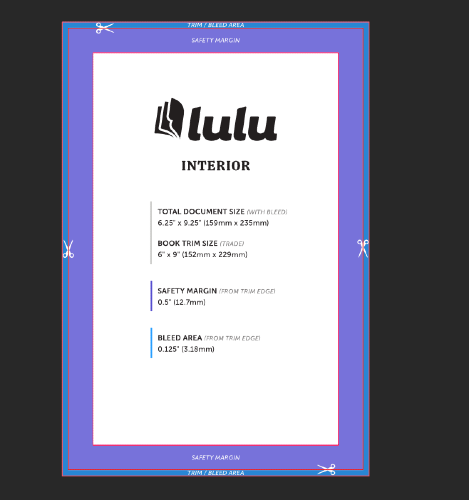
Opening the single-page file in Affinity creates 1 Master page (I’ll explain that momentarily) with some details about margins and bleeds.
The spreads template builds a file with multiple Master pages and inserts placeholder content to help you design your file. This includes copyright text, title and half-title pages, and some body text from Moby Dick as a sample.
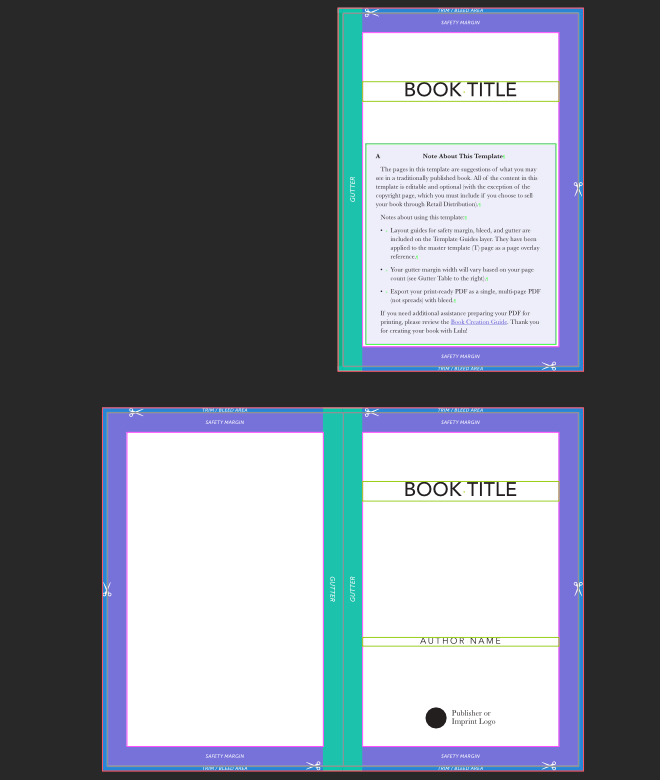
I recommend using the Spread template if you’re new to page layout and need some guidance. Just remember to remove or replace ALL of the placeholder content before you export your print files. Anything in your file when you export will be in the PDF and will be printed when you order your proof.
If you’re more comfortable with page layout and designing, the single-page template gives you more freedom to modify and build your own pages with only the margin and bleed information required for your designs.
Step 2: Master Pages & Document Setup
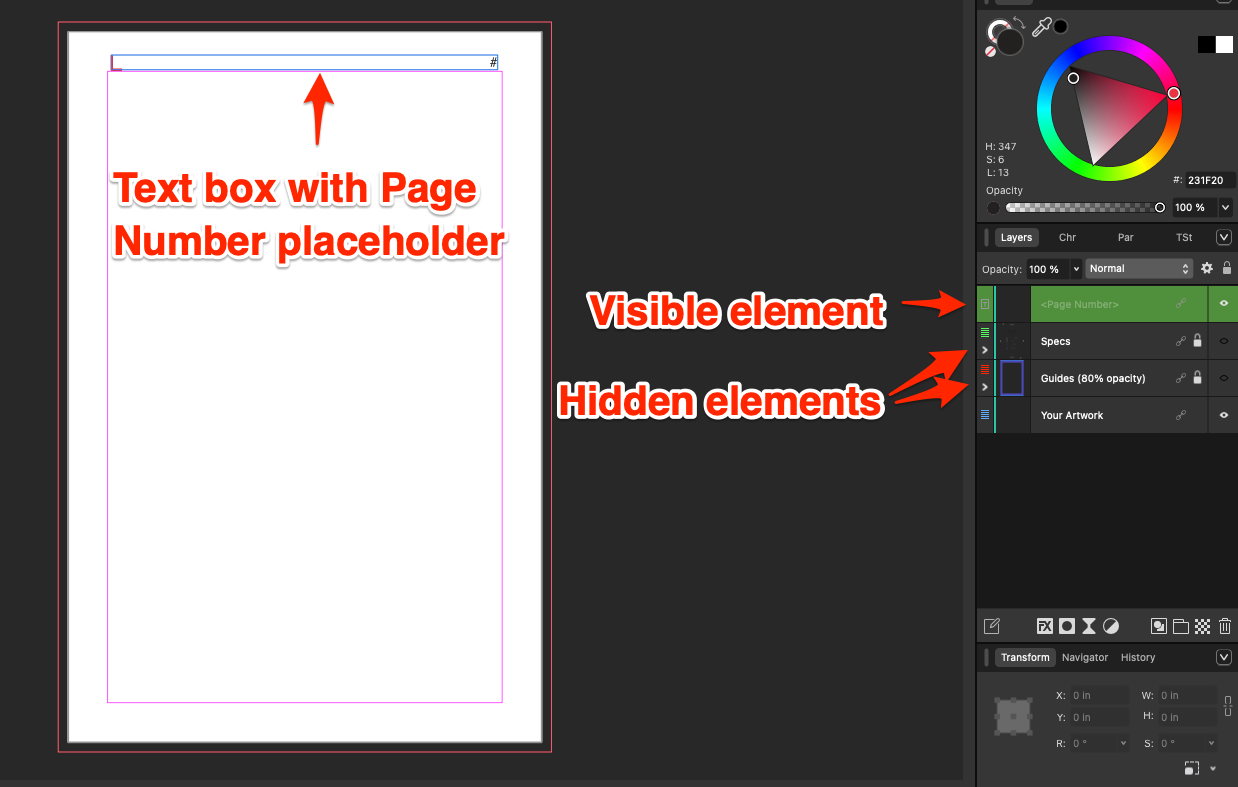
For the most skilled designers, Master pages do a ton of work. The basic idea is that a Master page will include formatting elements that you’ll reuse across multiple pages in your file. Things like the header or footer are usually modified through a Master page, ensuring all pages based on that Master feature have uniform content. Things like page numbering, or the author/book title in the header are very common elements for a Master page.
In the image below, I’ve added a text box just above the safety margin (so in my header) that I’ve inserted a ‘page number’ placeholder. I’ve hidden the Lulu guides + specs information, so you’re just seeing the page with the margins and header text box.
Now, if you look at a page in my document, you’ll see the page numbering starting with 1.
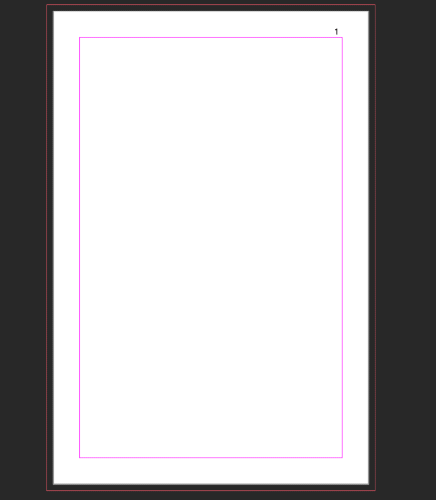
Each subsequent page will have an ascending page number. And if I wanted front matter with no page numbers, I could design a unique Master page and insert it before these. The page numbering would still begin at 1 on the appropriate page, while the front matter would be unnumbered.
The first step of your layout process should always be to prepare your Master pages for each part of your book. Lulu’s design templates ensure you’re getting the right size, margins, and bleed for those Master pages, making it easier to build and export a PDF that will print correctly. For most books, you’ll want 2 Masters: one for the front/back matter and one for the rest of the book. If you’ve got some unique layouts or graphics, you might build a Master page to accommodate those as well.
Step 3: Adding & Designing Your Content
Once you’ve got your Master templates sorted out, you’re ready to add your book’s contents. The best way to do this is to create a text box, paste your text in, and then expand that text box across pages. Here’s a super short video of how this normally works:
A short video showing how to manage text placement in Affinity by Canva
Each page contains a text box with your content flowing between them. It’s easy to insert distinct pages for chapter titles, images, graphs, or any other content. The text will still flow across the text boxes, and you’ll have control over the layout from page to page.
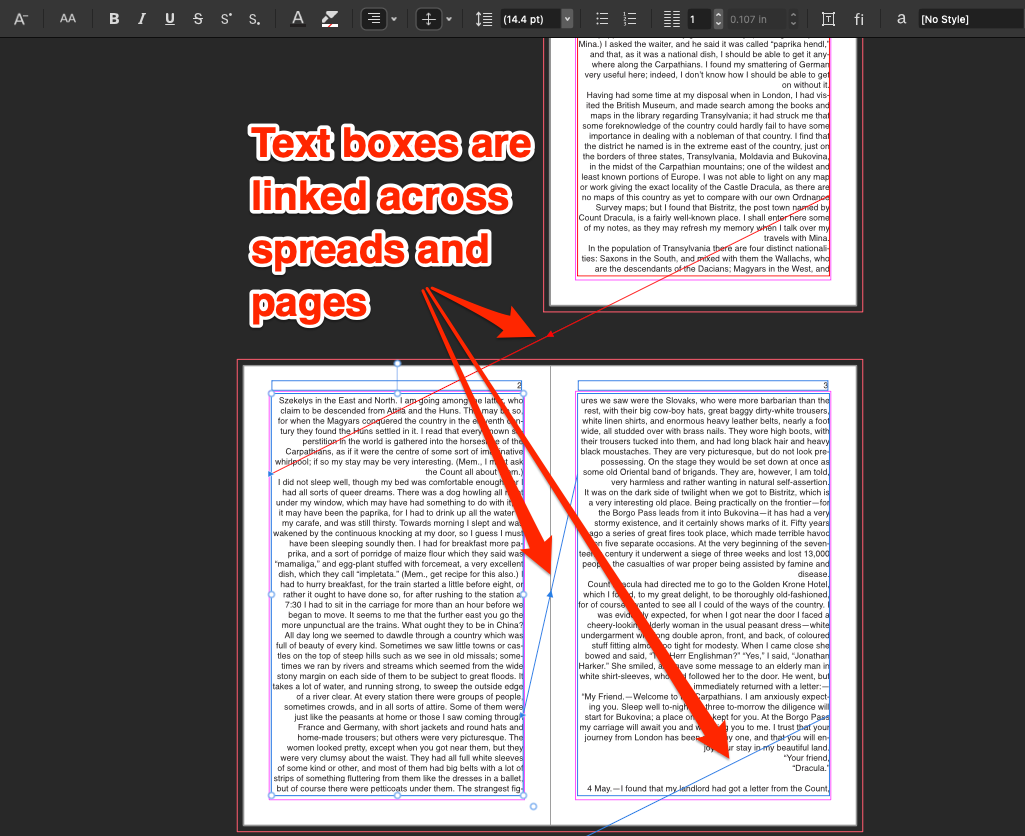
As you can see in the image, the text boxes are linked across pages, with the small arrow in each link showing the direct text flows. This allows you to easily edit all of your body text together while isolating specific pieces of text.
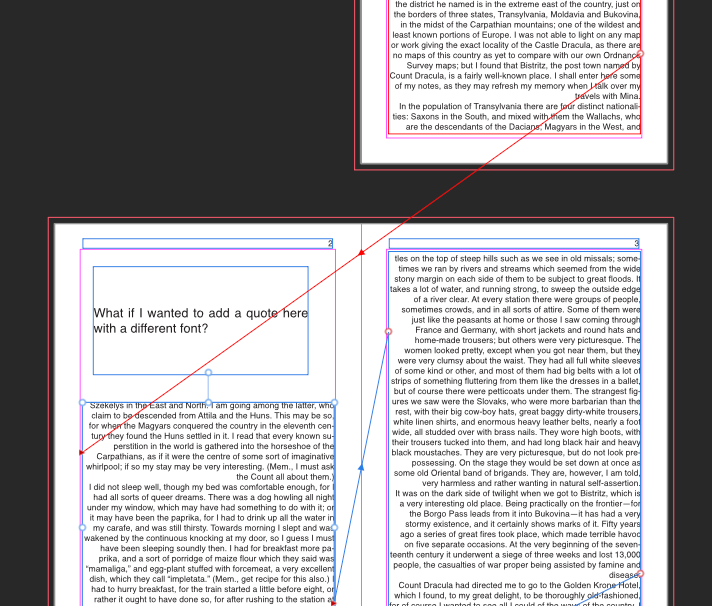
In this image, you can see that I added a new text box. When I reduced the size of the linked text box, all the text flowed to the following pages. Managing linked text boxes like this makes it easy to achieve complex layouts like a magazine or textbook design using columns, quotes, and any other content that requires unique formatting.
Step 4: Exporting a Print-Ready PDF
Once you’ve done all the design and layout work, including positioning your text, adding front matter, placing images, and formatting fonts, the final step before you can print your book is to export a print-ready PDF. There are a ton of options and presets you can manage when exporting a file from Affinity.
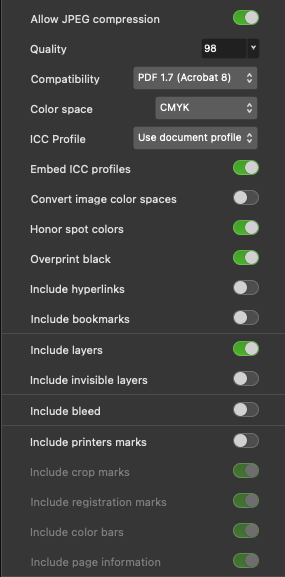
Here’s the basic export menu:
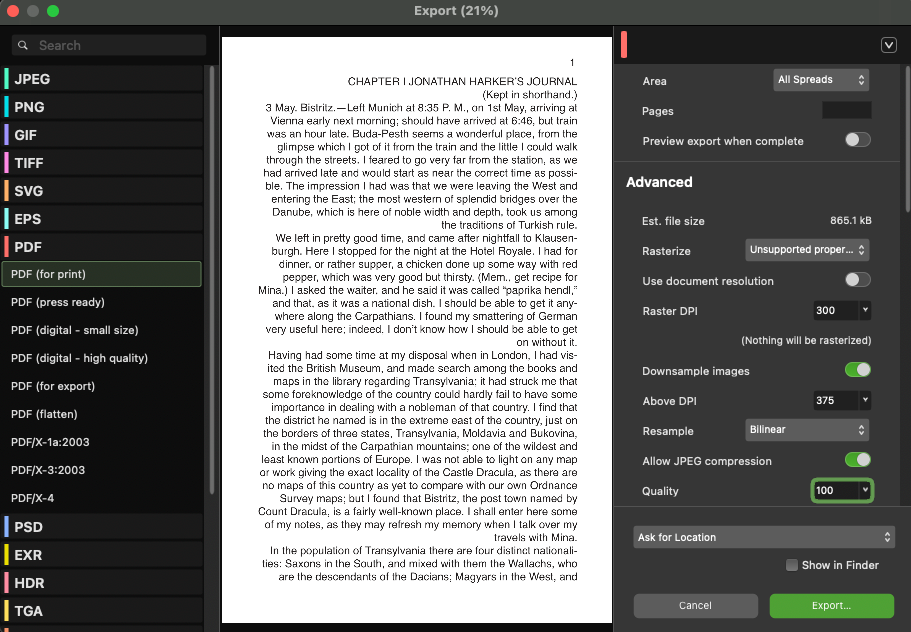
You’ll need to start by selecting PDF from the left. I recommended the (for print) option to make this easier, but (press ready) is also a fine PDF preset.
Now you’ve got a couple of important tune-ups to do before you export.
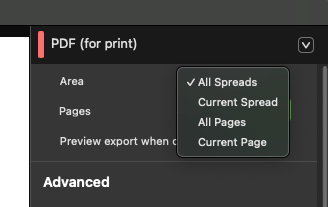
First, and this one is crucial, you need to change the ‘Area’ from ‘All Spreads’ to ‘All Pages’. If you neglect to do this, you’ll export a PDF set up with pages facing each other. Lulu’s system can’t accept facing pages—we need your PDF to be single page.
The second thing to adjust is the ‘Color space.’ This will most likely default to ‘As document,’ which will inherit the color space from the document. For Lulu’s printing, it’s advisable to change this to ‘CMYK’ to better match our printers’ hardware.
You should also verify that ‘Include bleed’ and ‘Include printer’s marks’ are both toggled off. Including these marks in your print PDF can be useful for smaller printers that do custom work. For Lulu’s automated printing systems, these marks are unnecessary.
With the export settings adjusted, you’re ready to create your Print PDF and upload it to Lulu!
Using Affinity for Simple, Consistent Page Layout
High-end design software is not cheap. Or at least, it didn’t used to be. As of January 2026 Adobe it still nearly $800 a year for their basic creative cloud, even with the steep discounts they offer (including student discounts and ‘first year’ rates). You could get just InDesign for around $270 for the year.
Or you can use Affinity by Canva for free.
If you’re creating a few books each year and are willing to learn Affinity, it’s really the best option. Far less expensive than InDesign, far more powerful than Word, and far easier to use than Scribus. For a professional designer, InDesign might still be worth it just for the absolute wealth of features (and you probably already know how to navigate InDesign).
For everyone else, Affinity is a clear winner. Page layout is simple and effective; the Vector and Photo tools make graphic and image editing possible without ever leaving the software, and you’ll have all the necessary options to export a PDF that Lulu can easily print.

Your Free Lulu Account
Create a Lulu Account today to print and publish your book for readers all around the world